Tax Free Shopping: UK

One of my favorite things about  the UK is that the price you see on the tag, is the price you pay! Unlike in the states, where tax is added on at the register and depending on the location could be over 10%. So walking through Primark on Oxford Street and seeing super cute Harry Potter sweatshirts for just 5 pounds is amazing!

Since the tax is already included in the price, there are no surprises at checkout, unless there’s an extra discount, in which, case bring on the happy surprises! As foreign travelers, we can get a tax refund, or some places call it tax-free shopping. To do so, just tell your cashier at checkout that you’re shopping tax-free. They will print out a form along with your receipt and ask to see your passport, so make you have it with you. There are certain amounts that you need to spend in order to get a tax refund and the amount is different depending on the store. For example, Jack Wills requires that you spend 50 pounds, while Longchamp required 75 pounds. Some other place are lower and some higher.

Before going to airport, fill out the forms and have them ready when you get to the airport. Depending on your airport of departure, you might just drop off the forms in an office and the check will be mailed back to you later, usually at smaller airports like Stansted.  Or you will need to wait in line to submit your forms and get back cash immediately. Although the dropping forms off is easier, it does take about 3-6 months before you get your money back. At Heathrow, we had to wait in the office, have a couple of our items checked, then got cash immediately.

Things to know:

  • Get to the airport early if you plan on completing a tax refund, the lines can sometimes be long and you don’t want to miss your flight!
  • Don’t check in your luggage before getting tax refund, they may ask to see any item.
  • Purchased items must not be worn or opened, in the case that they check each item.
  • It’ll be faster if one person makes the main purchases so that just one form is needed.

Halloween! Last Minute Costumes

I’m not very big on dressing up for halloween, but this year I figured I’d put in a little more effort to get the discounted burrito bowl at Chipotle, lol. Here are a few easy, comfortable costume ideas:

  1. Dustin from Stranger Things– It was around this last year that I binged watched both seasons of Stranger Things for the first time…yes, I was a little late.

2. Headbands, headbands, headbands    There are so many different headbands to choose from to coordinate with things you already have i your closet. This season, cheetah print is in, pair it with a cheetah print headband and you’ll be set!

3. Sabrina from the Chilling Adventures of Sabrina

Netflix just released this series and I know everyone is binge watching it before Halloween hits. This would be super easy to pull off and the pieces are reusable if you don’t already own it! To get this iconic look, you just need a red coat and a black headband. You might already have a classic red coat in your wardrobe, but if you don’t…

4. Now our costumes above are rather cute and fun, but if you prefer to be a bit more ghoulish– then you can opt to be someone from The Purge. You can order the mask, wear some white and go mad with a red marker (or fake blood if you’re dedicated).

Hope some of these ideas work for you! Use this links to amazon prime to make sure you get them in time!


Morning Skincare: Short and to the Point

I’ve always heard, “Take care of your skin to prevent early aging!!” And sad to say, as I’m nearing my 30’s I’m starting to think I should have started sooner…there’s just not enough time or money for all of the new life changing, or should I say “skin changing” products.

A little background about my skin journey: In my teens, my skin was relatively good, sure my skin was a little oily, but I do live in a hot a humid climate, so almost everyone had shiny skin. It wasn’t until my mid-20s when I started to struggle with problematic acne. It was during a pretty stressful time of grad school and starting my first in filed job that I started to really struggle with acne. My acne ranged from small whiteheads to large wide cysts that hurt. So with the acne, came the many products I bought in attempt to cure it and almost more importantly cover it! I tried everything!!

The one skincare line and three products that really saved me was La Roche-Posay. I used it for about two months, but honestly saw results in the first 1-2 weeks. I was so relieved after over a year of spending money on so many products. I will say that the foundation that really helped to cover and stay all day was the L’Oreal Infalliable Pro-Matte Foundation.

So after struggling with acne, then just oily skin, then wanting KPOP idol status skin, I found that just a simple, to the point routine has worked wonders for me. With just two steps in the morning:

Step 1: Toner

Step 2: Moisturizer

I truly feel that this toner has really helped to control my oil, and this is my go to moisturizer with anti-aging properties and SPF! It is a quite pricey, but when I think back to how many products I used before, it adds up to be almost the same.

Let me know what your holy grail products are!! I am in the market for an eye cream! Check out my nighttime skincare routine too!

Simple Nighttime Skincare

About a year ago, I was sucked into the 10-step Korean skincare craze–I bought everything, even multiple products for each step. I was so obsessed with trying to get the perfect routine down to reach my “KPOP idol” skin goals. Every morning and night, I would take the time to complete each step…

Fast forward a couple months, I did not see many results. In fact, my skin was a little worse for wear and did not feel great. My skin actually felt a little oilier. After to trying to get though as much of the products as i could, i was able to narrow down my skincare to four-five steps depending on the day. To some, five steps may still seem like a lot, but my skin has never been happier.

Step 1: Micellar water to take off any makeup or just oils/dirt built up from the day

Step 2: Gentle foam cream cleanser

Step 3: Exfoliator (every other day)

Step 4: Toner

Step 5: Rose hip oil https://amzn.to/2ENdGw9

Hope you found this helpful! Check out my even shorter morning skincare routine!!

TOP TRIP TIPS

Hello everyone!

Rese and Ry embarked on an adventure to the beautiful city of London. We spent a short amount of time there- only four days, but we packed those days to the brim! I wanted to share some tips to make your trip to London (or any destination) run smoothly.

  1. Use Google Maps to create a visual with pins on locations you want to hit up.
    1. Open Google Maps and select the menu option on the left hand corner
    2. Select “Your Places” and then “Maps”
    3. Create a map
    4. Search sights that you want to visit and pin them

It extremely useful to have a visual with all the sights I planned on visiting and the distance they were from each other. I was able to see which sights I am able to walk to and which order would be the most efficient. I also pinned my hotel on the map to see the distance I would have to travel from the hotel to the sight. You can select different colors to pin your spots as well. Also, you can use this tool to search the closest Pret A Manger cause that’s important. Here’s mine for our first day in London.

Screen Shot 2018-04-03 at 9.54.37 AM.png

2. Go to Pret A Manger. 

This is a sandwich chain, but they serve much more than sandwiches. Their coffees and treats are delicious! They also have amazing healthy options for each meal of the day, like a Golden Latte made of turmeric. I recommend their porridge (I promise it is not bland and ordinary). This shop is all over London and in some places of the USA, but no where close to where I live.

3. Use Google Maps to navigate the Underground and the Bus System. 

Although I was able to read the tube maps as my travels went on, they can still be confusing for someone who never uses public transit in their hometown. Google Maps offers clear instructions on which stops to get on and off. Make sure to screenshot them since there won’t be service underground. Notice the colors of the tube line and the number of which bus to board. Rese and I found the bus system to be much more comfortable to ride and it was nice to look out the windows (and no stairs like the underground haha).

4. Use Instagram to research 

So when you google a top travel spot, you see stock photos and those aren’t truly what the destination will look like. Instagram’s “Places” will show you accurate photos from Londoners to everyday travelers. It also helps you gage the weather and fashion choices you should make when you pack. Superficially, it also gives you good ideas for a good ‘gram post #doitforthegram, haha. For example, I wanted to visit House of MinaLima (Harry Potter graphic designer’s museum/ exhibit) but I didn’t know what they offered until I check the Instagram location. So from the Instagram screenshot below, I could see they have cool staircase and a Marauders Map on the floor.

IMG_3327.PNG

5. Google Flights

is a great search engine. It’s clean, doesn’t have a million ads, and you can search the cheapest dates to travel.

London: Why and What

This is a blog post about how we ended up in London for only two days but had an absolute blast. I was in a dilemma when I canceled my study abroad trip and was left with a one way ticket to Gothenburg, Sweden. Of course, I had bought the cheapest ticket being a student and all so there was no refunds but I didn’t want that ticket to go to waste. I somehow convince Rese to go on a trip with me…. the plan was simple. Go to Sweden a few days and have fun, but wow money was an issue. Sweden’s hotels and airbnbs are EXPENSIVE and while searching for flights for Rese, we saw how affordable flights to London were. Thus, our trip to London was born after I spent hours making an organized spreadsheet for Sweden with flights, sights, and kites (jk but it rhymed).

I still had my GOT ticket so I booked a one way ticket from Sweden to LGW, London, UK with Norwegian Air for only $30 that departed two hours after I landed. I had qualms that I would miss this flight, but I actually had a lot of time to spare. The only odd bit was that the border office pointed out my arrival and departure date were the same, but it was fine. Rese and I strategized for me to make my flight since I only had a backpack on me and no luggage. Rese would check her luggage and we would share. This way I could avoid baggage claim and ensure I find myself on the departing flight. Before we traveled, I was pretty anxious I would be stuck in Sweden with no hotels nor plans and Rese would end up in London alone. However, it all went well so it’s possible to buy separate tickets to get you to your final destination. It is worth noting that GOT is a very gorgeous airport with modern and clean designs that pays homage to IKEA.

Ok, now that’s explanation is done with- here is what we did in London. Rese and I met up in LGW at around 8AM and we took the train to Central London and then took the underground to our hotel. We stayed at QBIC Hotel (after searching on Google for “clean, affordable, nice hotel London” and it worked!). It was a very hip and cool hotel in Shoreditch, which is quintessentially the hipster, alternative part of London. We left our bags, changed (I had traveled for over 24 hours!) and made our way to Oxford Street.

THE ITINERARY 

Day 1

  • Oxford Street
    • Primark
    • Liberty
  • Lunch at Wagamams
  • Blacklock for Sunday Roast

Day 2

  • Platform 9 3/4
  • St. James Park
  • Buckingham Palace
  • Big Ben
  • Millenium Bridge
  • St. Paul’s Cathedral
  • Shakepeare’s Globe
  • Fish and Chips Detour
  • Oxford Street
    • Afternoon Tea at Harrods
    • Primark

Day 3

  • Greenwich
    • English Breakfast
    • Prime Meridian
  • National Gallery
  • Oxford Street


Icelandic Layover Adventure

Layovers are usually boring and the worst part of traveling–it’s another pitstop that is just delaying your trip to your final destination. Most of the time it’s spent sitting in an airport doing pretty much nothing. I didn’t think i’d ever actually chose to have a longer layover during my trip. Instead of the usually 2-3 hour layover, my sister and I chose the 7 hours stop in Iceland on our way back from our trip. During the 7 hours, we were able to have an experience like no other–the BLUE LAGOON!!

img_1266

Our flight landed at 8:45AM and we were on the us to the Blue Lagoon by 9:00AM-so crazy. The bus trip from the airport to the lagoon was about 30 minutes. Our entrance time to the Blue Lagoon was for 12:30PM, so we had to wait a little. But it was no detriment to our fun. There was so much to see and so many  pictures to take all around the area. we were surrounded by nature–amazing lava rocks and beautiful blue milky waters.

img_1273

The people at the Blue were super nice and let us in about an hour and half earlier than our ticket time. So once we were in the blue lagoon, we got our wristbands, towels and went to the locker rooms. The wrist band were used to access and lock up the lockers and purchase drinks in the lagoon.

img_1261

The weather in mid August was a little chilly, but the waters were amazingly warm. The lagoon was surrounded by mountains, so the scenery was beautiful. In addition to the lagoon, there were also in water massages,  waterfalls, saunas, steam rooms, and face masks!


DISNEY ANNUAL PASSHOLDER?!

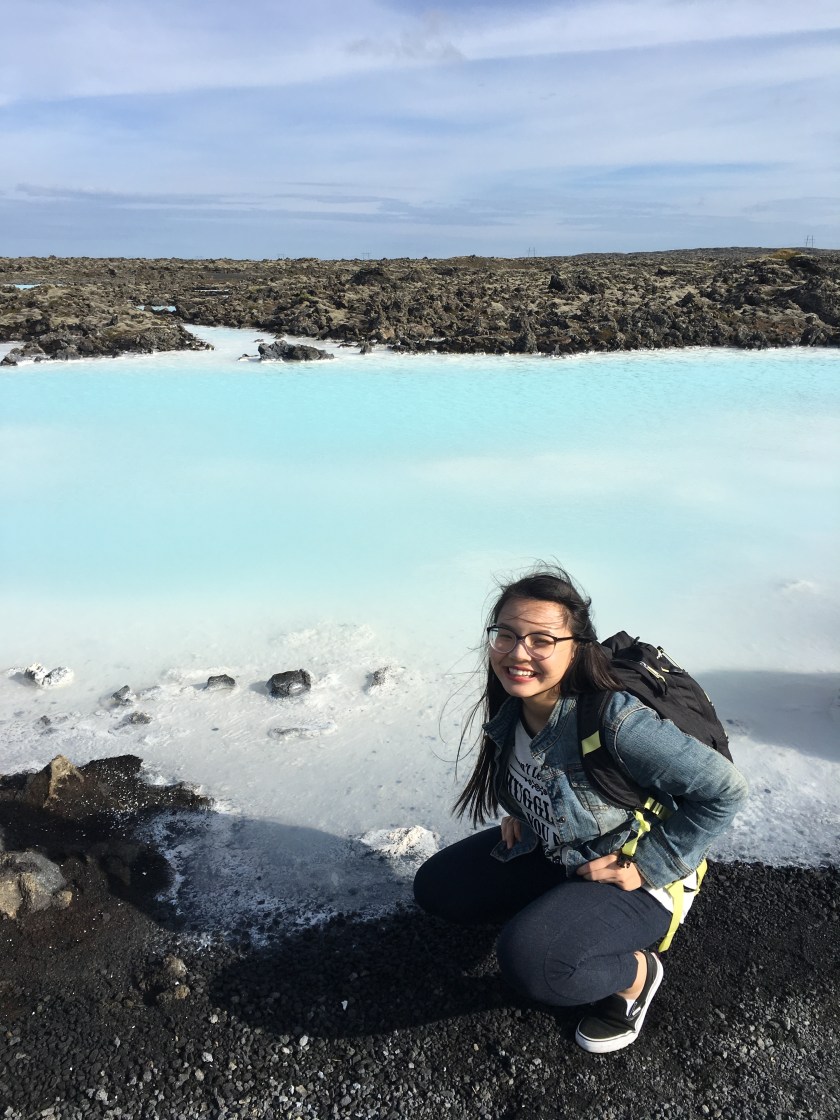
So every new year starts with a reflection on your past and a commitment to be a better person, like getting a gym membership. Rese and I had the typical discussion on whether we should get gym memberships and go to 5:00 AM cycling classes…however, our discussion led to getting Disney World Annual Passes. 😀

A nice, long day at Disney can do wonders for your legs right?

Before purchasing, we did a little research to determine the most beneficial time for us to purchase the tickets. We didn’t want them to immediately start right after purchasing, but we found out that the passes are not initiated until you go to the park! That was good news.

We are born and raised Floridians, so we are pretty familiar with Disney in a sense. We have lovely family members that can bring us into the park with Park Hopper tickets. So we always experienced a super fun and super fast way through all four parks in a day. We tend to spend the least amount of time in Magic Kingdom, due to that one always being the most popular and overcrowded.

I had the bright idea we should spend our first day at Disney at Magic Kingdom, since we would finally be able to experience it fully (NOTE: this was a bad idea). The first step was parking. We left the house at 10:00 and it took us 30 minutes to park the car. We then hopped on the park transportation that took us to the ticket center. If there wasn’t that transportation service, that walk would have made me lose 10 pounds (Disney> gym).  At the ticket center, we had to wait in line for 1 WHOLE HOUR to get our annual passes. I don’t know how I forgot how crowded Magic Kingdom was. I really wished we had decided to go to Epcot to pick up our passes. The lines there would have definitely been shorter.

We also weren’t sure if the MagicBand were included in our passholder ticket or not. Good news, they were!! The cast member issuing our passes explained that I can order them the app and they would take about a week to arrive. I’m a little bummed I didn’t order them before trip. I ordered them immediately and decided to get gray and Rese got purple. I figured I wouldn’t get sick of the color and it looked the tiniest bit of chic. Rese took forever in deciding and went for purple after seeing everyone’s wrist at the park.

img_2854-copy

After that brutal wait time, we boarded the ferry to go to Magic Kingdom. I had gotten us two Fast Passes, one for Thunder Mountain @ 11:15 and one for Space Mountain @ 5:15. We had missed the time for Thunder Mountain since we didn’t know getting our tickets would take so long. Our first step was getting Mickey ears! We found the primary hat shop a little off of Main Street and started to try on alll the ears. Most ears are $19.99 and $24.99 (but pass holders receive a 20% discount!). They had a bunch of new ears that I never saw before, but Rese and I decided to stick the traditional ones. I got the plush ones and Rese got the sequined black and red ones. It’s great–we can always trade. Honestly, these ears look super cute and comfy on everyone, but wow they’re tight. I felt super cute in them, but at what expense?! The new spring time (orange and flowers) ears felt the most loose though, so if you have a big head I would recommend those.

image5.jpeg

So we ventured out with our ears, and somehow ended a past a churro stand. It smelled amazing and you get chocolate dipping sauce with each churro! So we shared a $5 churro, which was pretty tasty but should a churro ever cost $5? The dipping sauce was also okay. Next, we wandered some more and really had no idea where we wanted to go. I decided I wanted to try the Pineapple Dole Whip at Aloha Isle in Adventureland that everyone raves about. Find this location was a bit tricky. I tried to use the paper map but I suck at map reading and spatial awareness…somehow Rese found it.

I recommend trying out the Dole Whip! It’s very light and pleasant. It’s super creamy, but I read somewhere that it is dairy free so that that’s pretty neat! After enjoying the whip, we stumbled into the Enchanted Tiki Show thinking that it was a bird show. I have a big fear of birds but somehow I wanted to watch the show. I was disappointed but also relieved when we found out that the show was made of robot birds singing. This is a good attraction for when you want to get out of the heat and not have to bear a long wait time.

unknown.jpg

After that show, we decided we might as well grab lunch since the parade would start in an hour. We ended at Mexican Place and got burgers. The topping station is super generous with lots of salsas, corn salsa, and endless helpings of guacamole!!! The burger was $15, but the 20% discount applied! After eating, we stepped out of the dining establishment to watch the parade. It started to rain right then, luckily we had some covering from the restaurant’s pavilion. We learned that at the end of the parade, you can start walking behind it and become a part of the parade. We were just trying to get to Space Mountain, but saw that trailing behind the parade was much faster than going through the crowded spectators on the sidewalk. I think the little ones would love to ‘be in the parade!’ Once we go to Space Mountain, the wait time was 175 minutes. I was so happy I got us fast passes! Waiting in that line would be miserable. Fast pass allowed us to dash through the line. We only waited about 15 minutes.

It had been years since I’ve been on Space Mountain and it’s pretty different from what I remember. It is a fun ride and def a lighter rollercoaster. You should be careful with your ears though, it is super easy for them to fly off. After the ride, I was feeling pretty tired and didn’t want to spend the whole day there (I missed my dog too). So we decided to start heading out from the park, and not feeling guilty since we can return to the park any time with our passes. When we had the park hopper tickets, we utilize every single minute as to not waste the ticket.

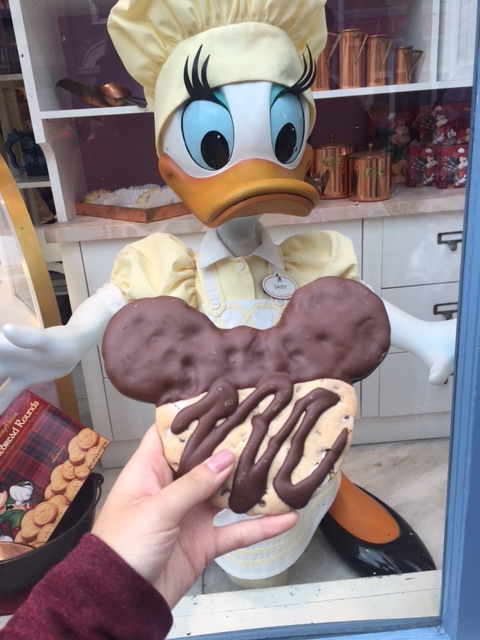
Before leaving the park, we had a detour into the bakery. It really smells amazing in there, we were practically lured in. They had super cute cute candy apples for sell so we decided to get one and share. The line was kind of long and we got on in it. About 3/4 of the way through, we could then see the price for one apple is $10….we were too far in to go back. They had Minnie Mouse, Nemo, variations of Mickey Mouse, and all of them being so cute. I had the choice of getting it whole or sliced. I was basic and wanted pics so I got it whole. We also got a super big Mickey Mouse chocolate chip cookie. We started eating the cookie, since eating the apple would be near impossible. The cookie was pretty good and super cute.

image7

image9

Overall, spending time with my sister is always super fun. We have busy schedules so having a day at Disney was nice. We mostly spent the time trying all the foods at Magic Kingdom that weren’t at other parks, since we weren’t sure when we would return to this park. Magic Kingdom is the most crowded and the most ‘Disney’ so it’s great to experience but having a nice, leisure time would be found in other parks. They’re all great parks, but it wasn’t what I was looking for. However, I was also looking for a gym membership here so my arguments are pretty weak (maybe we should’ve skipped the cookie haha). I’m also pretty introverted and hate crowds, so I defintely have bias.

PS: We ate the apple next day and it was surprisingly delicious. Honestly, they have their candy apples DOWN. The caramel and chocolate layers were done to perfection.

AirBaltic Review

During August, my sister and I booked a roundtrip for Helsinki and Paris. They offered a great flight that had the shortest travel time since all other airlines had lengthy layovers. Their prices were also among the cheapest, but with that comes the obvious headaches of budget airlines.

Before booking, I was aware that this airline would come extra fees but the difference in prices from standard airlines and this budget airline lured me over. The first extra fee that can leap out and attack an unsuspecting traveler would be the checking in fee. I was able to avoid this from reading others’ experiences online. Checking in online and printing out your tickets/ using e-tickets has no extra charger so pre-plan. My sister and I opted to check our luggage, which was another fee we were willing to pay.

Now the part that really bugged me about AirBaltic was that they forced us to check our carry-on luggage. Between my sister and I, we have 2 backpacks and 1 small luggage. They made us weigh everything and the total of weights cannot exceed 10 kg. It is pretty unreasonable and that extra fee was a true attacker. AirBaltic got us. I thought I did my research well, but clearly I failed. Another big issue was that not everyone was forced to check their luggage. My sister and I were clearly the only non-Nordic passengers there and the only ones forced to check our bags. This happened again at a layover in RIX right when we were about to embark onto the plane.

Other notable points would be regarding their seats and plane set up. They were the thinnest sits I’ve ever sat on for a plane and the most crammed I have every felt.

Safe to say I have learned my lessons with budget airlines.

Happy bookings,

Ry

The Journey to the Bullet Journal

I’ve been on the search for the PERFECT planner. My goal in life is to be organized and I love to plan and write things down–so I can check them off. It just seems more permanent and solidified…it also helps me to remember better 🙂 I’ve research and tried SO many different planners and agendas in the hopes of finding the perfect planner.

Screen Shot 2016-09-02 at 11.12.31 AM.png

I started off using the traditional planners from Target and office supply stores, but they just didn’t have the right set-up for me. I usually have a long task of things to do each day and I like to write them all down so I can check them off and feel productive. So then I started seeing that Erin Condren planners were all the rage and so many people were in love with them. I, too, became mesmerized by the planners—so many choices of covers, set-up, etc. The binding even started coming in rose gold! Then I took a look at the price…$50+ for a planner just seemed a little too much for my budget. I wanted to plan, but not go broke while doing it. So my sister found some alternatives on etsy. We decided to order to from Plum Paper Planners… and they were great (pictured above). We were also able to find coupon codes too! It was almost exactly what I thought I wanted. After using the planner for about a year, I felt like I still needed more organization. So I continued my journey in search of the perfect planner. I came across Bullet Journaling. I can honestly say it has changed my life. I find my productivity has increased tremendously! I will share some parts of my Bullet Journal soon!